Website feedback widgets make it easy for your users to give feedback. They provide a feedback button or similar that sits on your website and triggers a customised feedback form.
Most website feedback widgets say they are easy to install. But what does this actually mean?
- Quick install description for most feedback widgets
- Installing a WordPress feedback plugin
- Installing a feedback widget on Shopify websites
- Installing a feedback widget on Learning Management Systems (LMS)
- Installing a feedback widget via a browser extension
We’ll use installation instructions for our feedback widget (Saber Feedback) as a guide – these should be fairly similar to instructions for other feedback widgets.
Quick install description for most feedback widgets
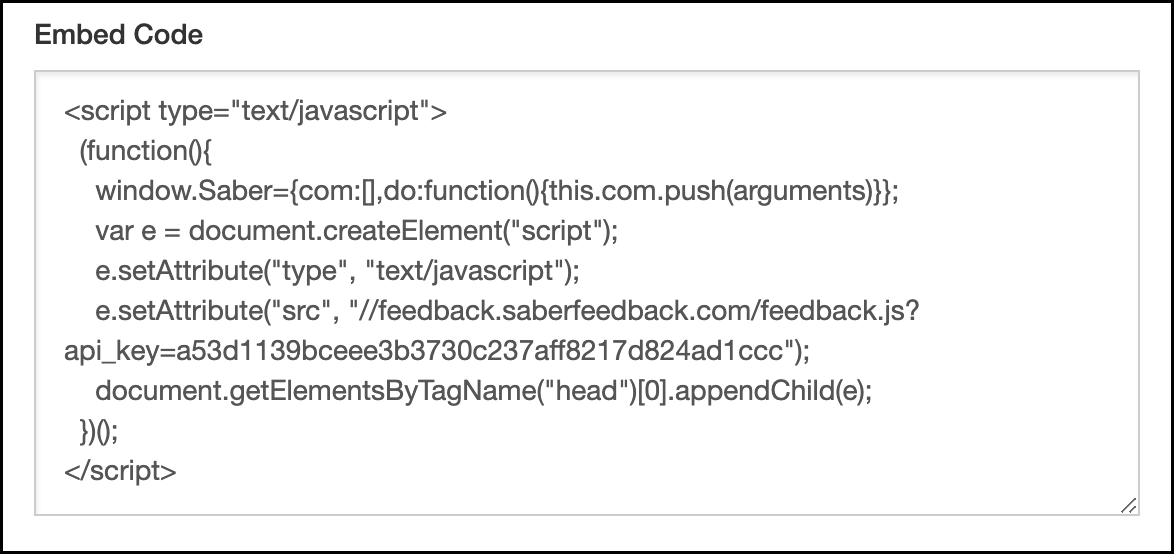
- Get widget code from the feedback tool of your choice
- Paste into your website just before the closing </head> tag
- Save
 The feedback widget code usually looks a bit like this
This is usually all it takes to install a feedback widget. You’ll now see a feedback button or similar on your website:

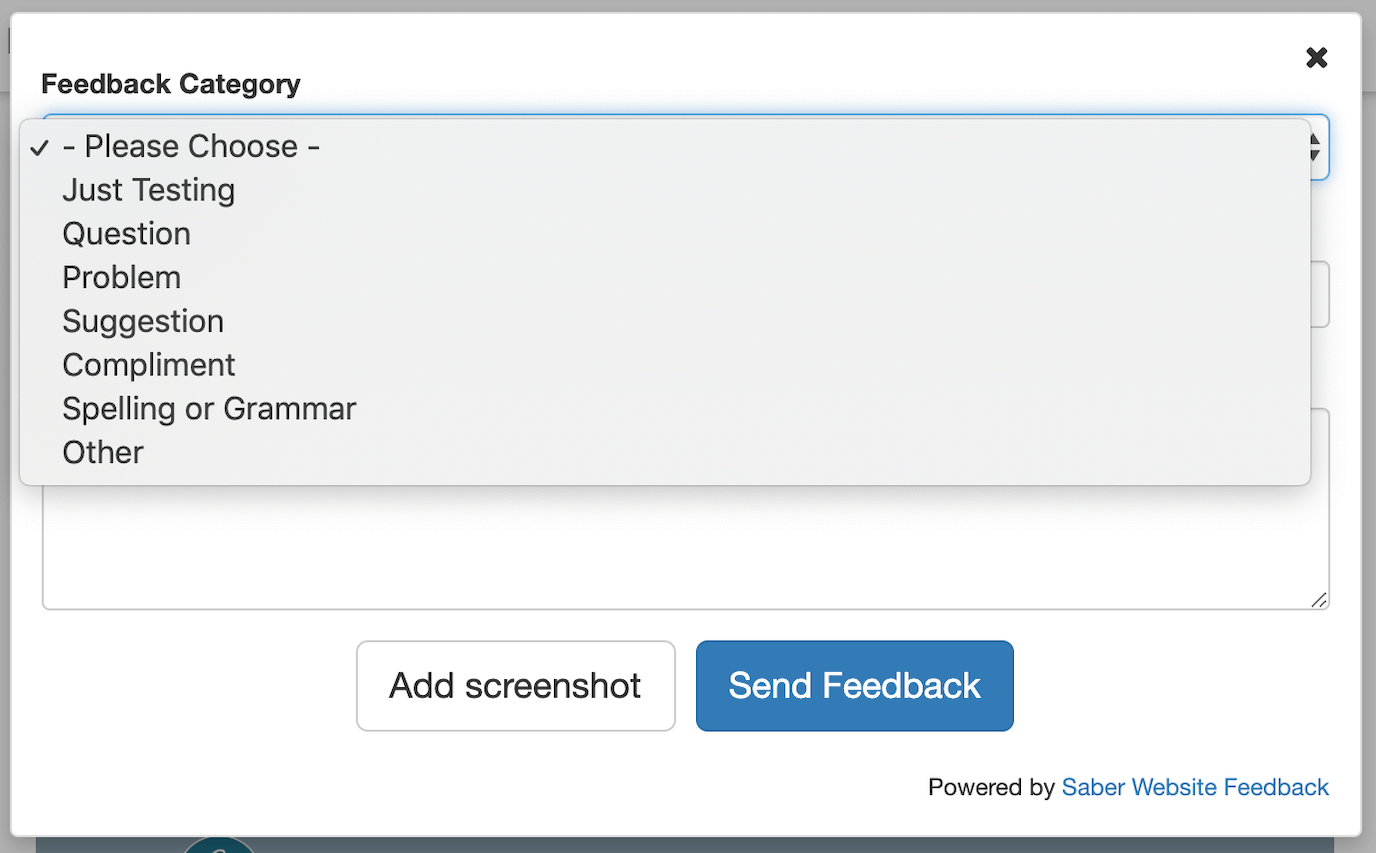
When your users click on this button they’ll see a customised feedback form. This can be as simple as a question asking whether they’d recommend your product to their friends. Or it can be a more complex form with subcategories, like this one:

Installing a Wordpress feedback plugin
Some feedback widgets have a plugin for WordPress websites. The install process for these is simple. Here are the instructions for our feedback widget:
- Download the Saber Feedback plugin directly from your WordPress control panel (search for ‘Saber Website Feedback’). It will install automatically.
- Activate widget through the Plugins screen in your WordPress control panel, and enter your API key
If you opt to manually install from the WordPress Plugins Directory, you will need to upload the files to the wp-content/plugins/ directory on your web server.
Installing a feedback widget on Shopify websites
This should only take a few minutes. Here are the instructions for our feedback widget:
- Log in to your Shopify Admin area, choose Online Store and then Themes from the left menu
- Click the big blue Customise theme button
- Choose Theme options > Edit HTML/CSS from the top menu
- Edit the theme.liquid file, in order to add the Saber Feedback embed code to it
- Scroll to the bottom of that file, look for </body>, and paste your embed code just above that
Installing a feedback widget on Learning Management Systems
Learning Management Systems (LMS) make it easy for you to create elearning programmes. Some popular LMS include Moodle, LearnDash and WPLMS.
Although install instructions vary between systems, the process should be straightforward.
For example, these are our install instructions for Moodle:
- Log in to your Moodle Admin area, and then choose Site administration from the left menu
- Select the Appearance tab, and then choose the Additional HTML option
- Paste the Saber Embed Code into the Within HEAD textarea, and then click the blue Save changes button
Installing a feedback widget via a browser extension
Although this isn’t an option we choose to support, other feedback widgets offer installation via browser extensions.
For example, Marker.io is a visual bug tracker. They currently only offer installation via browser extensions. These are their instructions for adding Marker.io to Chrome
- Go to the Extensions page for the web browser in question (like this one for Chrome)
- Select ‘Add to Chrome’
- Select ‘Add extension’
Saber Feedback – a simple and flexible feedback widget for any website
Saber Feedback is designed to be easy for you to install, customise and connect to your other tools.
It’s a good ‘all-round’ feedback widget with enough flexibility to be really useful, but without all the extra complexity that make new tools a hindrance rather than a help.
Why not try us out? We have a 30-day free trial.
